Baked Chicken Breast: The Secret to Juicy, Tender Perfection Every Time
I’ll never forget the first time I served dry, rubbery chicken breast to my family. My husband politely chewed through it, my kids asked for cereal instead, and I swore I’d figure out how to make actually good baked chicken breast. That was five years and hundreds of chicken breasts ago.
Here’s the truth nobody tells you: perfectly juicy, tender baked chicken breast isn’t hard to make. You just need to know a few key techniques that most recipes skip over. Once I learned these secrets, I went from serving dry hockey pucks to making chicken so juicy that my family actually asks for seconds.
This recipe will teach you exactly how to bake chicken breast that’s golden on the outside, impossibly juicy on the inside, and flavorful enough that you’ll want to make it every week. No brining overnight, no complicated techniques – just simple, foolproof steps that work every single time.

Recipe Card
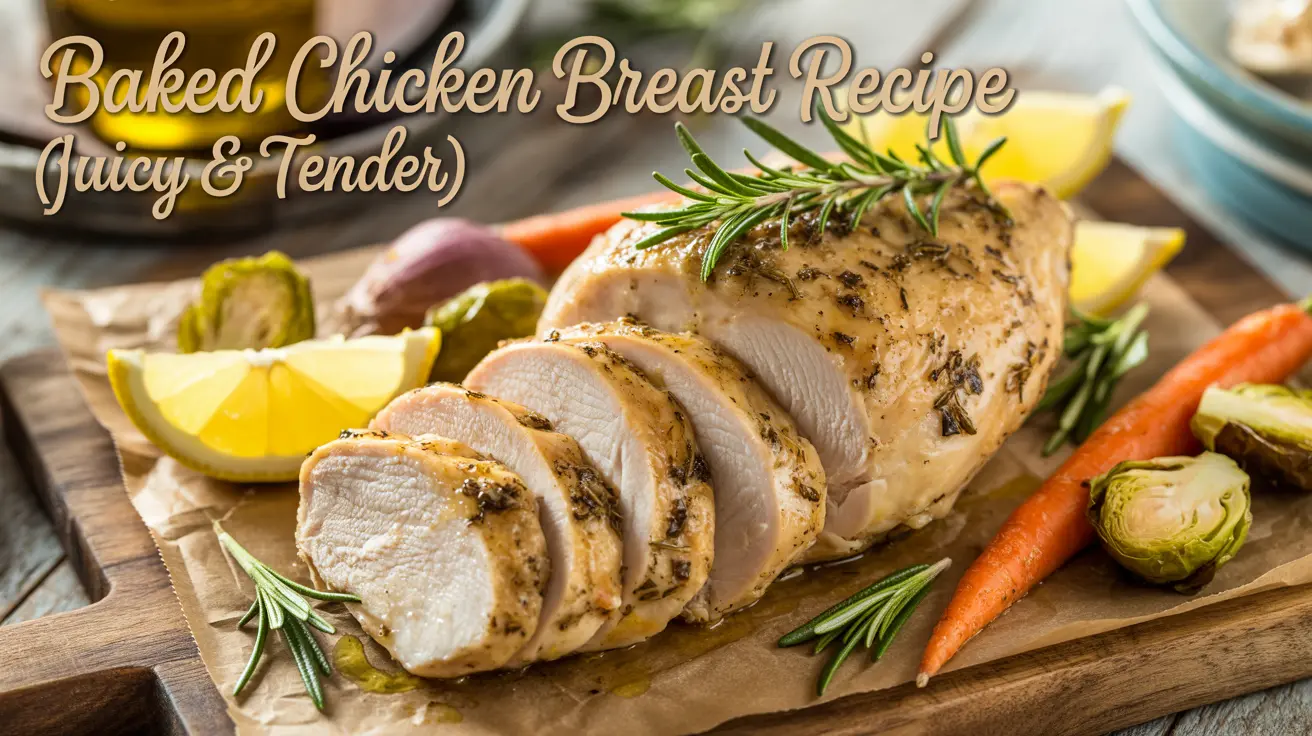
Baked Chicken Breast Recipe (Juicy & Tender)
Cuisine: AmericanDifficulty: Easy4
servings5
minutes20
minutes175
kcal25
minutesIngredients
4 boneless, skinless chicken breasts (about 6-8 oz each)
2 tablespoons olive oil
1½ teaspoons salt
1 teaspoon black pepper
1 teaspoon garlic powder
1 teaspoon paprika
½ teaspoon onion powder
½ teaspoon dried oregano or Italian seasoning
Directions
- Preheat oven to 425°F. This high temperature is key to getting a golden exterior while keeping the inside juicy. Let your oven fully preheat – this usually takes 10-15 minutes.
- Prepare the chicken. Pat chicken breasts completely dry with paper towels. This is crucial! Any moisture on the surface will steam instead of brown, leaving you with pale, less flavorful chicken.
- Pound to even thickness. Place chicken breasts between two pieces of plastic wrap or parchment paper. Using a meat mallet or heavy pan, gently pound the thick end until the entire breast is about ¾ inch thick throughout. This ensures even cooking.
- Season generously. Rub olive oil all over each chicken breast. In a small bowl, mix salt, pepper, garlic powder, paprika, onion powder, and oregano. Sprinkle this seasoning mixture evenly over both sides of the chicken, pressing gently so it adheres.
- Arrange on baking sheet. Place seasoned chicken breasts on a rimmed baking sheet lined with parchment paper or lightly greased with cooking spray. Make sure they're not touching – leave at least an inch of space between them for air circulation.
- Bake for 18-20 minutes. Place the baking sheet in the center of your preheated oven. Bake for 18-20 minutes, depending on the thickness of your chicken. The internal temperature should reach 165°F when measured with a meat thermometer inserted into the thickest part.
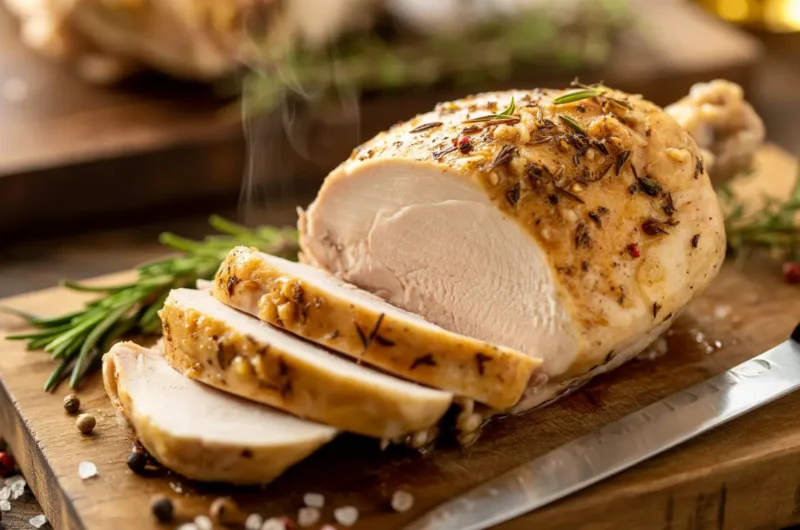
- Rest before slicing. This is THE most important step that everyone skips! Remove chicken from the oven and tent loosely with foil. Let it rest for 5 minutes before cutting. This allows the juices to redistribute throughout the meat instead of running out onto your cutting board.
- Slice and serve. Slice against the grain and serve immediately with your favorite sides.
Notes
- Don't skip the pounding step – even thickness = even cooking = no dry spots
- Use a meat thermometer – it's the only way to guarantee perfectly cooked chicken
- The resting time is mandatory – slice too early and all those precious juices escape
- Chicken sizes vary – adjust cooking time based on thickness, not weight
Why This Method Works (The Science Made Simple)
I’ve tried every chicken breast method out there – low and slow, high heat, covered with foil, uncovered, you name it. After testing them all, this method consistently produces the juiciest results. Here’s why:
High heat (425°F) creates a golden exterior fast. At this temperature, the outside of the chicken browns beautifully before the inside overcooks. Lower temperatures take longer, giving the chicken more time to dry out.
Pounding to even thickness is non-negotiable. Chicken breasts are naturally thicker at one end. If you skip this step, the thin end will be overcooked and dry by the time the thick end reaches 165°F. Even thickness = even cooking = juicy chicken throughout.
Oil + generous seasoning = flavor and moisture. The oil helps conduct heat and promotes browning. It also helps the seasonings stick and creates a barrier that keeps moisture in. Don’t be shy with your seasoning – chicken breast is mild and needs it.
Resting is where the magic happens. When chicken cooks, the heat pushes moisture toward the center. If you cut it immediately, all that juice runs out. Resting for 5 minutes lets the temperature equalize and the juices redistribute back through the meat.
According to research published in the Journal of Food Science, letting meat rest after cooking can retain up to 30% more moisture compared to slicing immediately. That’s the difference between dry and juicy.
For more chicken cooking techniques, check out our Ultimate Chicken Recipe Collection.
Choosing and Preparing Your Chicken
Not all chicken breasts are created equal. Here’s what to look for:
Size matters: Look for chicken breasts around 6-8 ounces each. Anything larger than 10 ounces will take longer to cook and is harder to cook evenly. If you have massive chicken breasts, cut them in half horizontally to create two thinner pieces.
Fresh vs. frozen: Fresh chicken will have slightly better texture, but frozen is perfectly fine (and often more affordable). If using frozen, thaw completely in the refrigerator overnight. Never cook from frozen – the outside will overcook before the inside is done.
Organic vs. conventional: This is personal preference and budget. Both cook the same way. Organic tends to have slightly better flavor, but it’s not worth breaking the bank over.
Trim excess fat: While chicken breast is already lean, trim any visible fat or connective tissue before cooking. It doesn’t render well at this temperature and can be chewy.
Pat them dry: I can’t stress this enough. Use paper towels and really pat them dry. Moisture is the enemy of browning.
[IMAGE PROMPT 2: “Create a step-by-step preparation photo showing three stages: 1) Raw chicken breasts on a cutting board with a meat mallet, 2) Chicken being brushed with olive oil, 3) Seasoned chicken ready for the oven with spices visible on the surface. Clean, bright photography on a white marble countertop. Include a small bowl of mixed spices. Educational and clear. Vertical format 1000x1500px.”]
Step-by-Step to Perfect Baked Chicken Breast
Let me walk you through each step with the tips I’ve learned from making this hundreds of times.
Step 1: Preheat Your Oven
Don’t skip preheating! Put your oven on 425°F and wait until it beeps. Most ovens take 10-15 minutes to fully preheat. Use this time to prepare your chicken.
Pro tip: If your oven runs hot or cool (most do), invest in an oven thermometer. I discovered my oven was actually running 25°F cooler than the dial showed, which explained why my chicken was taking forever to cook.
Step 2: The Pounding Technique
Place your chicken breast on a cutting board. Cover with plastic wrap or put it inside a large freezer bag. This prevents raw chicken from splattering everywhere.
Using a meat mallet (or the bottom of a heavy skillet), gently but firmly pound the thick end of the breast. Don’t smash it – use controlled, even pressure. You want the whole breast to be about ¾ inch thick.
Why ¾ inch? Any thinner and it cooks too fast and dries out. Any thicker and you need to cook it longer, risking the exterior overcooking.
Don’t have a meat mallet? Use a rolling pin, a small heavy pan, or even a can of beans. Anything with some weight works.
Step 3: Oil and Season Like You Mean It
Drizzle olive oil over the chicken or rub it on with your hands. Make sure every surface is coated – this helps the seasonings stick and promotes browning.
Mix your spices in a small bowl first. This ensures even distribution. Then sprinkle generously over both sides of each chicken breast. Press the seasonings into the meat gently.
My seasoning ratio: For 4 chicken breasts, I use about 2 tablespoons total of seasoning blend. That’s roughly 1½ teaspoons per breast. It seems like a lot, but chicken is mild and needs bold seasoning.
Step 4: Baking Setup
Line your baking sheet with parchment paper for easy cleanup (or lightly spray with cooking oil). Arrange chicken breasts with space between them – at least 1 inch. If they’re touching, the sides won’t brown properly.
Middle rack placement: The center of your oven has the most even heat. Top rack might burn the surface before the inside is done. Bottom rack can result in pale chicken.
Step 5: Timing Is Everything
For ¾-inch thick chicken breasts at 425°F, you’re looking at 18-20 minutes. But here’s the thing – oven temperatures vary, chicken sizes vary, so the only way to know for sure is to use a thermometer.
At 15 minutes: Check your thinnest piece. If it’s at 160°F, pull the whole pan. Carryover cooking will bring it to 165°F during resting.
At 18 minutes: Check all pieces. Pull anything that reads 165°F.
At 20 minutes: Even the thickest pieces should be done.
If they’re not done at 20 minutes: They’re probably thicker than ¾ inch. Keep cooking and check every 2 minutes until they reach 165°F.
Step 6: The Mandatory Rest
Pull the baking sheet from the oven. Tent the chicken loosely with aluminum foil. Set a timer for 5 minutes and walk away.
I know it’s tempting to cut into it immediately to check if it’s done. Don’t do it! Those 5 minutes make the difference between good chicken and great chicken.
What’s happening during the rest: The internal temperature continues to rise slightly (usually 3-5°F). The muscle fibers relax. The moisture that was pushed toward the center starts to redistribute. The result? Juicy chicken in every bite.
The Secret Nobody Tells You
Want to know the real secret to juicy baked chicken breast? It’s not a special ingredient or complicated technique. It’s simply this:
Don’t overcook it.
That’s it. That’s the secret.
Chicken breast is safe to eat at 165°F. Not 175°F. Not 180°F. At 165°F. Every degree past that makes it drier.
The difference between juicy chicken breast and dry chicken breast is often just 5-10°F. That’s why a meat thermometer isn’t optional – it’s essential.
Get a digital instant-read thermometer. You can find a decent one for under $15. It’s the single best investment you can make for cooking chicken.
How to use it:
- Insert the thermometer into the thickest part of the chicken
- Make sure you’re not hitting the baking sheet (metal conducts heat and gives false readings)
- Pull the chicken when it reads 160-165°F
- Remember it will continue cooking during the rest
I destroyed so many chicken breasts before I started using a thermometer religiously. Now I nail it every single time.
More chicken cooking tips in our complete chicken guide.
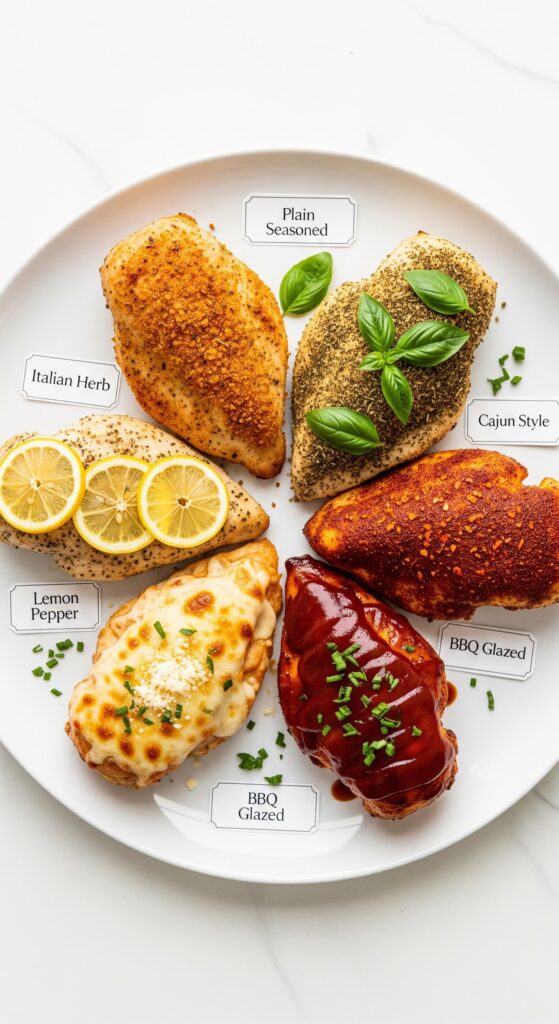
Flavor Variations to Keep It Interesting
Once you master the basic method, these variations keep dinner from getting boring:
Italian Herb Chicken
Replace the basic seasonings with:
- 2 teaspoons Italian seasoning
- 1 teaspoon garlic powder
- 1 teaspoon onion powder
- ½ teaspoon red pepper flakes
Serve with marinara sauce and mozzarella cheese.
Lemon Pepper Chicken
- Zest of 2 lemons
- 2 teaspoons coarsely ground black pepper
- 1 teaspoon salt
- 1 teaspoon garlic powder
Squeeze fresh lemon juice over the chicken after baking.
Cajun Spiced Chicken
- 2 teaspoons Cajun seasoning
- 1 teaspoon paprika
- 1 teaspoon garlic powder
- ½ teaspoon cayenne (or to taste)
Perfect for spicy food lovers. Serve with ranch dressing on the side.
Garlic Parmesan Chicken
Use the basic method, but during the last 5 minutes of baking:
- Sprinkle ¼ cup grated parmesan over the chicken
- Add 1 teaspoon minced garlic
- Return to oven to melt cheese
Pro tip: Finish under the broiler for 1-2 minutes for extra golden cheese.
Mediterranean Chicken
- 2 teaspoons oregano
- 1 teaspoon basil
- 1 teaspoon garlic powder
- Zest of 1 lemon
Serve with Greek salad and tzatziki sauce.
BBQ Chicken
Follow the basic method, but:
- Brush with BBQ sauce during the last 5 minutes of baking
- Use your favorite BBQ sauce (about 2 tablespoons per breast)
- Be careful not to add it too early or the sugar will burn
Perfect for summer dinners even when you can’t grill.
What to Serve with Baked Chicken Breast
Baked chicken breast is incredibly versatile. Here are my favorite ways to serve it:
As a Main Dish
Pair with classic sides:
- Roasted vegetables (my go-to)
- Mashed potatoes
- Rice pilaf
- Green beans
- Simple garden salad
Sliced Over Salads
- Caesar salad with sliced chicken
- Cobb salad
- Strawberry spinach salad
- Any salad that needs protein
In Sandwiches and Wraps
- Chicken Caesar wrap
- Buffalo chicken sandwich
- Caprese chicken sandwich (mozzarella, tomato, basil, balsamic)
- Club sandwich
Meal Prep Ideas
This chicken is perfect for weekly meal prep:
- Grain bowls: Rice, quinoa, or farro with veggies and sliced chicken
- Pasta: Dice and toss with pasta primavera
- Tacos: Slice and use in chicken tacos
- Stir-fry: Dice and add to vegetable stir-fry
Storage tip: Cook 4-6 breasts on Sunday, store in the fridge for up to 4 days. Use in different meals throughout the week.
Make It a Complete Meal
Turn this chicken into a full dinner:
- Italian: Serve with pasta, marinara, and garlic bread
- Mexican: Slice for fajitas with peppers and onions
- Mediterranean: Pair with couscous, cucumber salad, and hummus
- Classic American: Mashed potatoes, gravy, and green beans
More dinner ideas in our 30-minute dinner collection.
Common Mistakes and How to Avoid Them
After making (and sometimes ruining) countless chicken breasts, here are the mistakes I learned to avoid:
Mistake #1: Not Pounding to Even Thickness
The problem: The thin end is overcooked and dry while the thick end is barely done.
The fix: Always pound to even thickness. Takes 30 seconds, makes all the difference.
Mistake #2: Cooking Straight from the Fridge
The problem: Cold chicken takes longer to cook, and the outside overcooks while waiting for the inside to catch up.
The fix: Let chicken sit at room temperature for 15-20 minutes before cooking. This helps it cook more evenly.
Mistake #3: Using Too Low a Temperature
The problem: Lower temperatures (350°F or less) mean longer cooking times, which dries out the chicken.
The fix: Use 425°F. The high heat browns the exterior quickly while keeping the inside juicy.
Mistake #4: Skipping the Meat Thermometer
The problem: Guessing when chicken is done leads to either undercooked (unsafe) or overcooked (dry) chicken.
The fix: Buy a $15 digital thermometer. Pull chicken at 165°F. Game changer.
Mistake #5: Cutting Into It Immediately
The problem: All the juices run out onto your cutting board instead of staying in the chicken.
The fix: Always rest for 5 minutes before slicing. Always. No exceptions.
Mistake #6: Crowding the Pan
The problem: Chicken steams instead of bakes, resulting in pale, less flavorful meat.
The fix: Leave at least 1 inch between each breast. Use two pans if needed.
Mistake #7: Not Seasoning Enough
The problem: Bland, boring chicken that needs sauce to be edible.
The fix: Season generously. Chicken breast is mild and can handle bold flavors. Use more seasoning than you think you need.
Mistake #8: Using a Too-Large Baking Dish
The problem: A huge roasting pan for 4 small chicken breasts means uneven heat distribution.
The fix: Use a pan that fits your chicken with about 1 inch of space around each piece. A standard half-sheet pan works perfectly for 4-6 breasts.
Storing and Reheating
Storage:
- Let chicken cool completely
- Store in an airtight container in the refrigerator
- Keeps for 3-4 days
Freezing:
- Wrap each breast individually in plastic wrap, then place in a freezer bag
- Label with date
- Keeps for up to 3 months
- Thaw in refrigerator overnight before reheating
Reheating: The key to reheating chicken without drying it out is gentle heat with moisture.
Best method – Oven:
- Preheat oven to 350°F
- Place chicken in a baking dish
- Add 2 tablespoons of chicken broth or water
- Cover tightly with foil
- Heat for 15-20 minutes until warmed through
Quick method – Microwave:
- Place chicken on a microwave-safe plate
- Add a tablespoon of water
- Cover with a damp paper towel
- Microwave on 50% power in 30-second intervals until warm
Avoid: Reheating on high heat or without moisture – this is how you end up with dry, rubbery reheated chicken.
Frequently Asked Questions
How do I know when chicken breast is done without a thermometer?
You really should use a thermometer for food safety, but if you don’t have one: the chicken should be firm to the touch, the juices should run clear (not pink), and when you cut into the thickest part, the meat should be opaque white throughout with no pink.
Can I use bone-in chicken breasts?
Yes, but adjust the cooking time. Bone-in, skin-on breasts will take 35-45 minutes at 425°F. The bone conducts heat slower, so they need more time.
Why is my chicken breast rubbery?
How do I know when chicken breast is done without a thermometer?
You really should use a thermometer for food safety, but if you don’t have one: the chicken should be firm to the touch, the juices should run clear (not pink), and when you cut into the thickest part, the meat should be opaque white throughout with no pink.
Can I use bone-in chicken breasts?
Yes, but adjust the cooking time. Bone-in, skin-on breasts will take 35-45 minutes at 425°F. The bone conducts heat slower, so they need more time.
Can I marinate the chicken first?
Absolutely! Marinate for 30 minutes to 4 hours in the refrigerator. Pat dry before baking to ensure good browning. Just note that wet marinades may need an extra 2-3 minutes of cooking time.
What if my chicken breasts are different sizes?
Pull each one from the oven as it reaches 165°F. The smaller ones will finish first. Or, cut the larger breasts in half to create more evenly sized pieces.
Is it okay if the chicken is slightly pink?
Young chickens can sometimes have slightly pink-tinged meat even when fully cooked to 165°F. As long as your thermometer reads 165°F in the thickest part, it’s safe. The pink color can be from myoglobin in young birds.
Can I cook chicken from frozen?
Not recommended. Frozen chicken will take about 50% longer to cook, and the outside will overcook before the inside is done. Always thaw first.
How do I keep chicken breast from drying out?
Follow these four rules: 1) Don’t overcook (pull at 165°F), 2) Pound to even thickness, 3) Use high heat (425°F), and 4) Always rest for 5 minutes.
More Chicken Recipes You’ll Love
Once you’ve mastered baked chicken breast, try these:
- Ultimate Chicken Recipe Collection – 100+ ways to cook chicken
- Grilled Chicken Breast – Perfect for summer
- Air Fryer Chicken Breast – Even faster and crispier
- Chicken Thighs – For dark meat lovers
- Slow Cooker Chicken – Set it and forget it
- Chicken Parmesan – Italian comfort food
Final Thoughts
Perfectly juicy baked chicken breast isn’t about complicated techniques or special ingredients. It’s about following a few simple rules:
- Pound to even thickness
- Use high heat (425°F)
- Season generously
- Don’t overcook (165°F!)
- Always rest for 5 minutes
That’s it. Master these five things, and you’ll never serve dry chicken breast again. This recipe has been a game-changer in my kitchen, and I make it at least twice a week. It’s my go-to for meal prep, quick weeknight dinners, and any time I need reliable, delicious chicken.
The first time you make juicy baked chicken breast, you’ll wonder why you ever struggled with it. The second time, you’ll realize how easy it actually is. By the third time, you’ll be making it without even looking at the recipe.
Start tonight. Your family (and your taste buds) will thank you.
Happy cooking!
Did you make this recipe? Leave a comment below and let me know how it turned out! And if you have any questions, I’m here to help.