Air Fryer Chicken Breast Recipe: Juicy, Not Dry (Every Time!)
I used to dread cooking chicken breasts. No matter what method I tried, they always came out dry and rubbery – the kind that require half a bottle of ranch just to choke down. Then someone suggested I try my air fryer, and I was skeptical. How could hot air circulating around chicken possibly make it juicy?
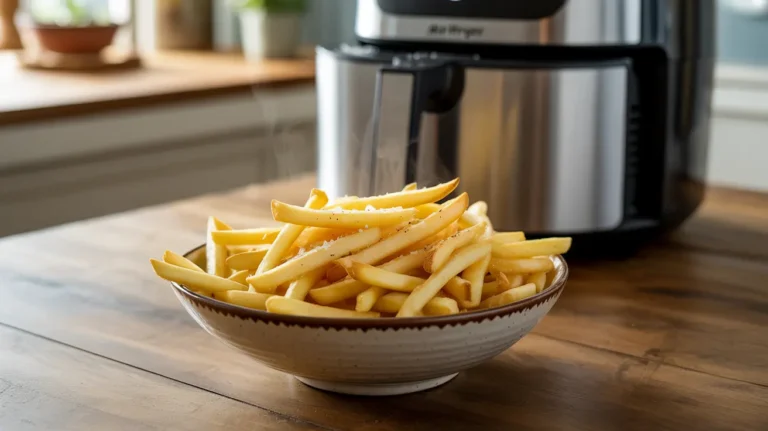
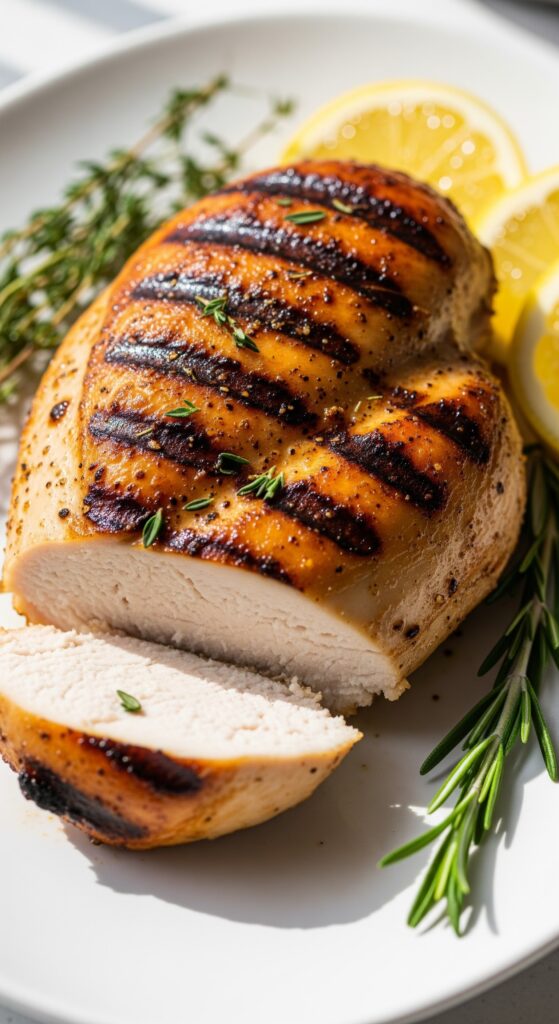
Turns out, I was completely wrong. Air fryer chicken breast is now my go-to method for weeknight dinners. It’s fast (just 12 minutes!), foolproof, and produces the juiciest chicken I’ve ever made at home. Golden on the outside, tender on the inside, with zero oil splatter to clean up afterward.
The secret? Temperature control and not overcooking. That’s it. Follow this simple method and you’ll never serve dry chicken breast again. I promise.
Recipe Card
Air Fryer Chicken Breast (Juicy & Tender)
Cuisine: AmericanDifficulty: Easy4
servings5
minutes12
minutes163
kcal17
minutesIngredients
2 boneless, skinless chicken breasts (6-8 oz each)
1 tablespoon olive oil
1 teaspoon salt
½ teaspoon black pepper
1 teaspoon garlic powder
1 teaspoon paprika
½ teaspoon onion powder
Instructions:
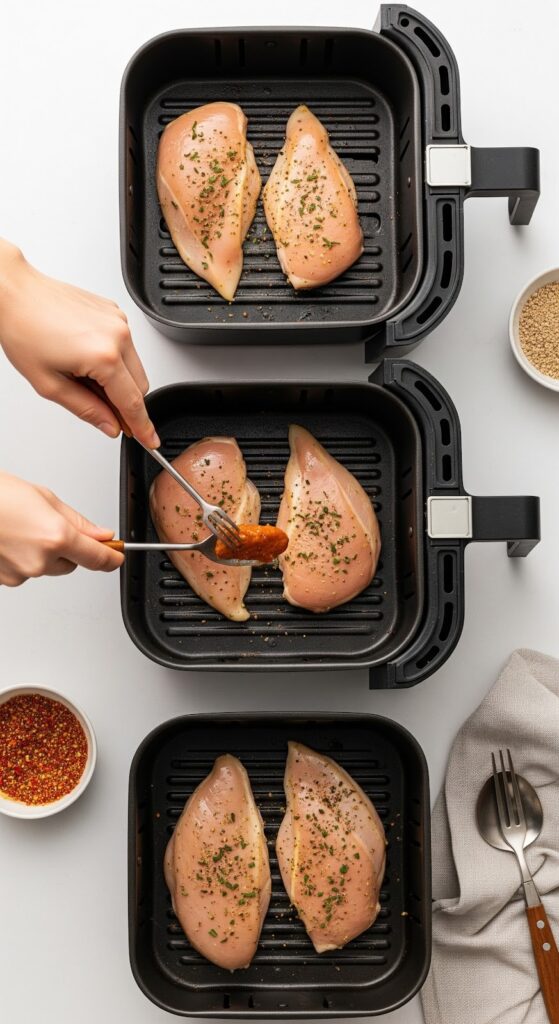
- Pound chicken to even thickness. Place chicken breasts between plastic wrap or parchment paper. Use a meat mallet or heavy pan to gently pound the thick end until the entire breast is about ¾ inch thick throughout. This is crucial for even cooking.
- Preheat air fryer to 375°F for 3-4 minutes. Preheating ensures the chicken starts cooking immediately and develops a nice golden exterior.
- Brush chicken with oil. Pat chicken dry with paper towels, then brush both sides with olive oil. This helps seasonings stick and promotes browning.
- Season generously. Mix salt, pepper, garlic powder, paprika, and onion powder. Sprinkle evenly over both sides of chicken, pressing gently so seasonings adhere.
- Air fry for 12 minutes. Place chicken in the air fryer basket in a single layer (don't stack or overlap). Cook at 375°F for 12 minutes, flipping halfway through at the 6-minute mark.
- Check temperature. Insert an instant-read thermometer into the thickest part. It should read 165°F. If it's not quite there, cook for 1-2 more minutes.
- Rest for 5 minutes. Remove chicken from air fryer and let rest on a cutting board, loosely covered with foil. This step is mandatory! It allows juices to redistribute throughout the meat.
- Rest for 5 minutes. Remove chicken from air fryer and let rest on a cutting board, loosely covered with foil. This step is mandatory! It allows juices to redistribute throughout the meat.
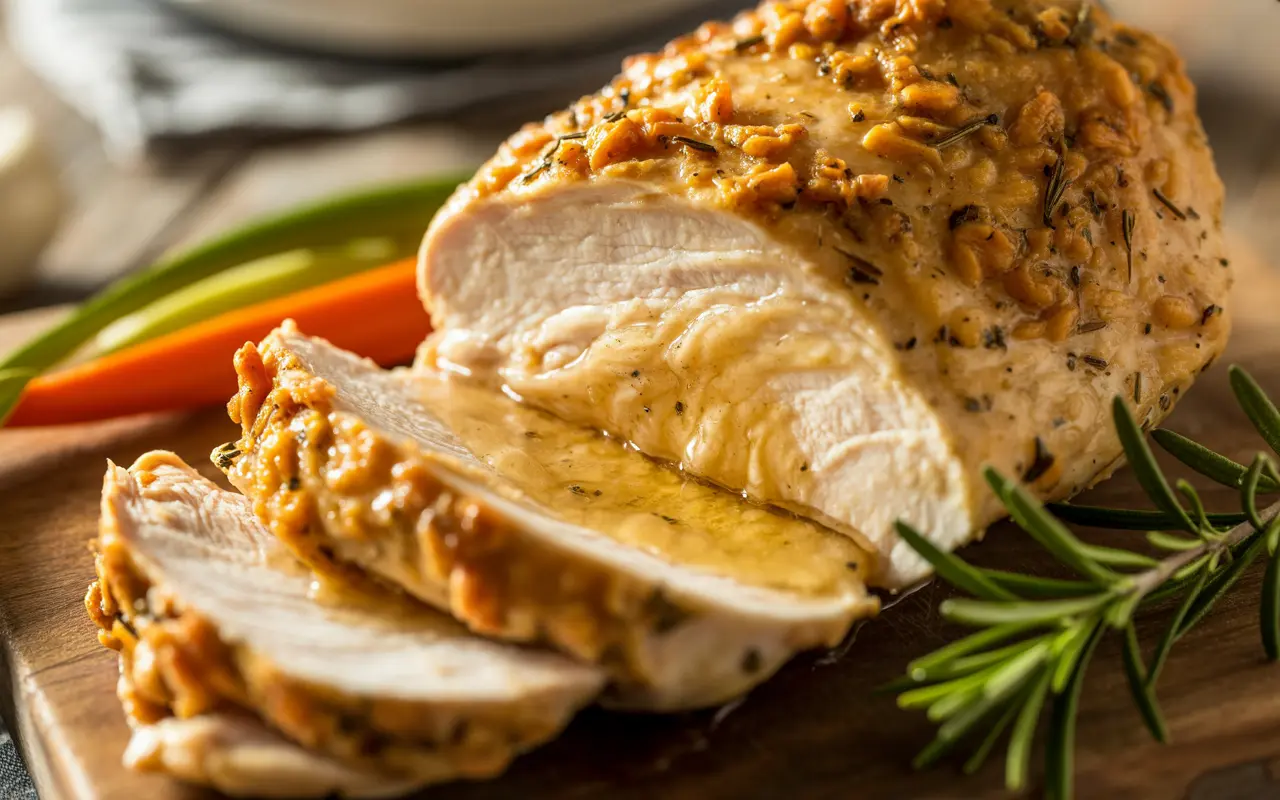
- Slice and serve. Slice against the grain and serve immediately.
Recipe Notes
- Even thickness is everything – this prevents dry edges and raw centers
- Don't skip the rest – cutting too early releases all the juices
- Use a thermometer – it's the only way to guarantee perfectly cooked chicken
- Cook time varies by thickness – thicker pieces need 14-15 minutes
- No oil spray needed – the tablespoon of brushed oil is sufficient
- Chicken sizes vary – adjust time based on thickness, not weight
Why Air Fryer Chicken Breast Works
I’ve cooked chicken breast every way imaginable – grilled, baked, pan-fried, poached – and the air fryer consistently gives me the best results for weeknight cooking. Here’s why this method is superior:
Fast cooking time prevents overcooking. At 375°F, chicken breast cooks through in just 12 minutes. The shorter cooking time means less opportunity for the meat to dry out. Baking chicken in the oven at 400°F takes 20-25 minutes – that extra time makes a huge difference in moisture retention.
Circulating hot air browns the outside without drying the inside. The air fryer’s convection cooking creates a beautifully browned exterior while keeping the interior juicy. You get that golden, slightly crispy outside that makes chicken breast actually appealing, not just “healthy and boring.”
Even thickness = even cooking. This is the real secret. A chicken breast is naturally thicker at one end. If you don’t pound it to even thickness, the thin end will be overcooked and dry by the time the thick end reaches 165°F. Taking 30 seconds to pound chicken to an even ¾-inch thickness is the single most important step.
The rest period is non-negotiable. When chicken cooks, the heat pushes moisture toward the center. If you cut into it immediately, all those juices run out onto your cutting board. Letting it rest for 5 minutes allows the temperature to equalize and the juices to redistribute. The difference between rested and not-rested chicken is dramatic.
For more details on cooking chicken perfectly, check out our guide to baked chicken breast.
Step-by-Step to Perfect Chicken
Let me walk you through this method with all the little details that make the difference.
Step 1: Prepare the Chicken
If your chicken breasts are massive (10+ ounces), cut them in half horizontally to create two thinner pieces. Most standard chicken breasts are 6-8 ounces, which is perfect.
Place one breast between two pieces of plastic wrap or inside a gallon freezer bag. Using a meat mallet, rolling pin, or the bottom of a heavy pan, gently pound the thick end. Don’t smash it – use controlled pressure. You want the entire breast to be about ¾ inch thick.
Why this matters: An unpounded chicken breast might be 1.5 inches thick at one end and ½ inch at the other. That’s a recipe for disaster. Even thickness means every part of the chicken reaches 165°F at the same time.
Step 2: Preheat Your Air Fryer
Set your air fryer to 375°F and let it preheat for 3-4 minutes. Some people skip this step, but I find it makes a noticeable difference in browning and cooking consistency.
Why 375°F and not higher? At 400°F, the outside browns too quickly and can dry out before the inside is cooked. At 350°F, it takes too long and the chicken steams more than it browns. 375°F is the sweet spot.
Step 3: Oil and Season
Pat the chicken completely dry with paper towels. Dry chicken browns better. Brush both sides with olive oil – you don’t need much, just enough to help the seasonings stick and promote browning.
Mix your seasonings in a small bowl, then sprinkle evenly over both sides. Press the seasonings into the meat gently so they adhere.
Basic seasoning is perfect. The simple blend of salt, pepper, garlic powder, paprika, and onion powder lets the chicken flavor shine through and works with any cuisine you’re pairing it with.
[VIDEO EMBED PLACEMENT: Search for: “How to Cook Chicken Breast in Air Fryer” Suggested: Look for videos showing the pounding technique and proper temperature checking Embed a 3-5 minute tutorial demonstrating the complete method]
Step 4: Air Fry
Place chicken breasts in the air fryer basket in a single layer. They can be close but shouldn’t be touching. If they overlap, they won’t cook evenly.
Cook for 6 minutes, then open the basket and flip each piece over with tongs. This ensures even browning on both sides. Close the basket and cook for another 6 minutes.
Don’t open the basket to check! Every time you open it, you release heat and extend cooking time. Trust the process and wait the full 6 minutes before flipping.
Step 5: Check Temperature
At 12 minutes, insert an instant-read thermometer into the thickest part of the chicken. You want 165°F. Not 155°F, not 175°F – exactly 165°F.
Slightly under is okay. If your thermometer reads 162-163°F, that’s fine. Remove the chicken and tent it with foil. The temperature will continue to rise 2-3 degrees during the rest period (carryover cooking).
Over is not okay. Every degree past 165°F makes chicken drier. This is why a meat thermometer isn’t optional – it’s essential. I destroyed so many chicken breasts before I started using one religiously.
Step 6: Rest
Place the chicken on a cutting board and tent loosely with aluminum foil. Set a timer for 5 minutes and step away from the kitchen.
I know it’s tempting to cut into it immediately to check if it’s cooked properly. Resist! Those 5 minutes are what separate dry chicken from juicy chicken.
More tips in our complete chicken cooking guide.
How to Tell When Chicken Is Done
The only reliable way to know if chicken breast is done is with an instant-read thermometer. Here’s what to look for:
Temperature: 165°F in the thickest part. The FDA says this is the safe minimum internal temperature for poultry. At this temperature, any harmful bacteria are destroyed, and the meat is perfectly cooked.
Visual cues (secondary): The meat should be opaque white throughout with no pink. When you cut into it, the juices should run clear, not pink or red. The meat should feel firm to the touch, not soft and squishy.
But seriously, use a thermometer. Visual cues can be misleading. Young chickens sometimes have slightly pink-tinged meat even when fully cooked. Juices can look clear even if the meat is undercooked. A $15 instant-read thermometer removes all guesswork.
What if it’s not done? If your thermometer reads below 165°F, put the chicken back in the air fryer for 1-2 more minutes and check again. Better to check multiple times than to overcook it.
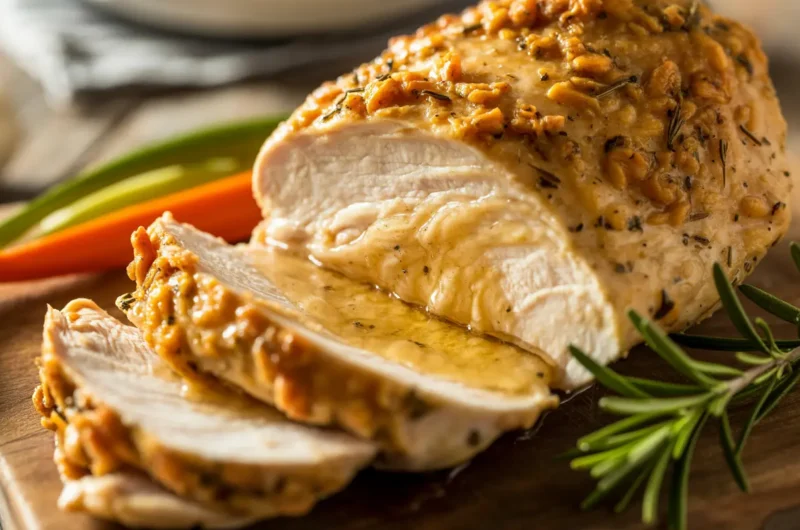
What if you overcooked it? If you accidentally cooked chicken past 170°F, it will be drier but still edible. Slice it thin and serve it with sauce, in a salad, or in tacos where the moisture from other ingredients compensates.
Flavor Variations
The beauty of this basic method is you can season chicken any way you like. Here are my go-to variations:
Italian Herb Chicken
Replace basic seasonings with:
- 2 teaspoons Italian seasoning
- 1 teaspoon garlic powder
- 1 teaspoon onion powder
- ½ teaspoon red pepper flakes
Perfect for pasta primavera or Caprese salad.
Cajun Spiced Chicken
- 2 teaspoons Cajun seasoning
- 1 teaspoon paprika
- 1 teaspoon garlic powder
- ½ teaspoon cayenne (adjust to taste)
Great for spicy chicken pasta or wraps.
Lemon Pepper Chicken
- Zest of 1 lemon
- 2 teaspoons coarsely ground black pepper
- 1 teaspoon garlic powder
- 1 teaspoon salt
Squeeze fresh lemon juice over after cooking. Serve with roasted vegetables.
Mexican-Style Chicken
- 2 teaspoons chili powder
- 1 teaspoon cumin
- 1 teaspoon garlic powder
- 1 teaspoon paprika
- ½ teaspoon oregano
Perfect for chicken tacos, burrito bowls, or fajitas.
Asian-Inspired Chicken
Brush with:
- 2 tablespoons soy sauce
- 1 tablespoon honey
- 1 teaspoon sesame oil
- 1 teaspoon grated ginger
Cook as directed, brushing with mixture halfway through. Slice and serve over fried rice or in stir-fry.
Simply Garlic & Herb
- 2 teaspoons garlic powder
- 1 teaspoon dried thyme
- 1 teaspoon dried rosemary
- Salt and pepper
A simple, versatile option that goes with everything.
Ways to Use Air Fryer Chicken Breast
This chicken is incredibly versatile. Here’s how I use it throughout the week:
As a Main Dish
Serve whole with classic sides:
- Mashed potatoes and green beans
- Rice pilaf and steamed broccoli
- Roasted sweet potatoes and salad
- Quinoa and roasted vegetables
Sliced Over Salads
- Caesar salad with sliced chicken
- Cobb salad
- Southwest chicken salad with black beans and corn
- Greek salad with feta and olives
In Sandwiches and Wraps
- Chicken Caesar wrap
- Buffalo chicken sandwich with ranch
- Caprese chicken sandwich (mozzarella, tomato, basil)
- BBQ chicken sandwich with coleslaw
Diced for Recipes
- Chicken fried rice
- Chicken quesadillas
- Chicken pasta salad
- Chicken and vegetable stir-fry
Meal Prep Champion
Cook 4-5 breasts on Sunday, store in the fridge for up to 4 days. Use them in different meals throughout the week:
- Monday: Sliced over salad
- Tuesday: Diced in quesadillas
- Wednesday: Whole with roasted vegetables
- Thursday: Chopped in fried rice
- Friday: In wraps with hummus and veggies
More meal prep ideas in our 30-minute dinner collection.

Common Mistakes to Avoid
After cooking countless chicken breasts in my air fryer, here are the mistakes I’ve learned to avoid:
Mistake #1: Not Pounding to Even Thickness
The problem: The thin end is overcooked and dry while the thick end is still raw.
The fix: Always pound chicken to ¾ inch thick throughout. This takes 30 seconds and makes all the difference.
Mistake #2: Cooking at Too High a Temperature
The problem: At 400°F, the outside burns before the inside is done.
The fix: Use 375°F. It’s the perfect temperature for juicy, evenly cooked chicken.
Mistake #3: Skipping the Meat Thermometer
The problem: Guessing leads to undercooked (unsafe) or overcooked (dry) chicken.
The fix: Buy a $15 digital thermometer. Pull chicken at exactly 165°F. Game changer.
Mistake #4: Cutting Into It Immediately
The problem: All the juices run out onto your cutting board instead of staying in the chicken.
The fix: Always rest for 5 minutes before slicing. Always. No exceptions.
Mistake #5: Cooking Frozen Chicken
The problem: The outside overcooks before the inside thaws and cooks through.
The fix: Always thaw chicken completely in the refrigerator overnight before cooking.
Mistake #6: Using Too Much Oil
The problem: Excess oil drips into the basket, creates smoke, and doesn’t make the chicken crispier.
The fix: One tablespoon brushed on is plenty. Chicken breast is lean and doesn’t need much oil.
Mistake #7: Overcrowding the Basket
The problem: Overlapping chicken pieces don’t cook evenly.
The fix: Cook in batches if needed. Single layer only.
Storing and Reheating
Storing:
- Let chicken cool completely
- Store in an airtight container in the refrigerator
- Keeps for 3-4 days
- Store whole or pre-sliced based on how you plan to use it
Freezing:
- Wrap each breast individually in plastic wrap
- Place in a freezer bag with the date
- Keeps for up to 3 months
- Thaw in refrigerator overnight before reheating
Reheating (to maintain moisture):
Best method – Air Fryer:
- Preheat air fryer to 350°F
- Place chicken in basket
- Heat for 3-4 minutes until warmed through
- Brush with a tiny bit of oil or broth to prevent drying
Stovetop method:
- Slice chicken before reheating
- Heat a skillet over medium heat with a splash of chicken broth
- Add sliced chicken and warm for 2-3 minutes
Microwave (least ideal):
- Place chicken on a microwave-safe plate
- Add a tablespoon of water or broth
- Cover with a damp paper towel
- Microwave on 50% power in 30-second intervals until warm
Frequently Asked Questions
How long does chicken breast take in the air fryer? For ¾-inch thick chicken breasts at 375°F, it takes 12 minutes (flipping halfway). Thicker pieces may need 14-15 minutes. Always check with a thermometer – time varies by thickness.
Do I need to preheat my air fryer? I recommend it! Preheating for 3-4 minutes ensures the chicken starts cooking immediately and browns evenly. Some air fryers cook fine without preheating, but I get better results with it.
Can I cook frozen chicken breast in the air fryer? You can, but I don’t recommend it. Frozen chicken releases moisture as it cooks, preventing proper browning and risking uneven cooking. Always thaw first for best results.
Why is my air fryer chicken dry? Usually because it’s overcooked. Chicken breast becomes dry when cooked past 165°F. Use a thermometer and pull it at exactly 165°F. Also make sure you’re pounding to even thickness.
Can I stack chicken breasts in the air fryer? No. Stacking prevents even cooking and browning. Cook in a single layer with space between pieces. Cook in batches if you need to make more.
Do I need to spray oil in the air fryer basket? Not necessary. The tablespoon of oil brushed on the chicken is sufficient. Chicken breast is lean meat and won’t stick if you let it cook undisturbed.
Can I use bone-in chicken breasts? Yes, but increase cooking time to 22-25 minutes at 375°F. Bone-in chicken takes longer because the bone conducts heat slower.
What if I don’t have a meat thermometer? Get one! They’re $10-15 and eliminate all guesswork. Without one, cut into the thickest part – the meat should be opaque white throughout with clear juices. But seriously, get a thermometer.
Final Thoughts
Air fryer chicken breast has transformed weeknight cooking in my house. What used to be a 30-minute ordeal of preheating the oven and watching chicken carefully now takes 17 minutes total – and the chicken is actually juicy.
The method is ridiculously simple:
- Pound to even thickness
- Cook at 375°F for 12 minutes
- Check temperature (165°F)
- Rest for 5 minutes
That’s it. Four steps to juicy chicken every single time.
The first time I made this, my husband asked what I did differently because the chicken was so much better than usual. I showed him the air fryer and the meat thermometer, and now he makes it himself for meal prep every Sunday.
Once you nail this basic technique, you can season the chicken any way you like. Italian, Mexican, Asian, Cajun – they all work with this method. It’s become my most-used recipe because it’s versatile, fast, and foolproof.
Start tonight. Your family (and your weekly meal prep routine) will thank you.
Happy cooking!