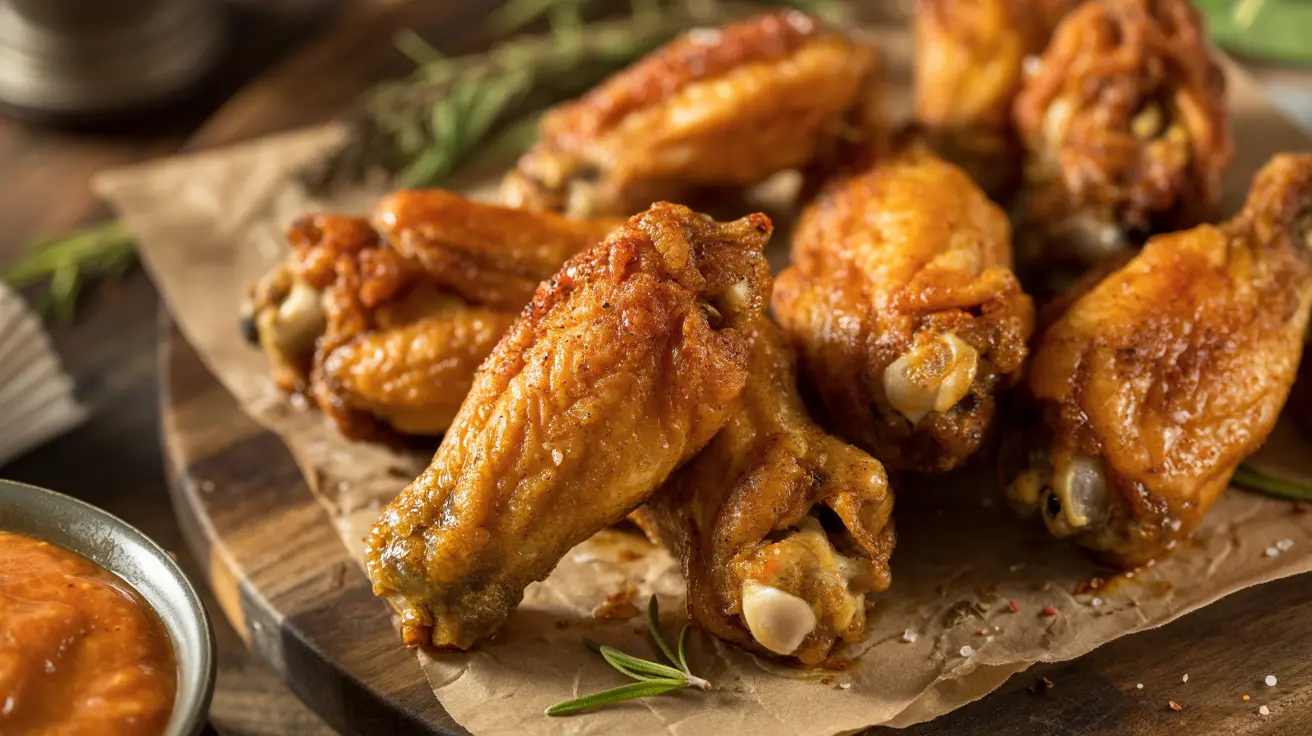
Air Fryer Chicken Wings Recipe: Perfectly Crispy Every Time
I’ll be honest with you: I used to think restaurant-quality chicken wings were impossible to make at home. The deep fryer seemed messy and intimidating, and oven-baked wings always came out soggy. Then I discovered the air fryer, and everything changed.
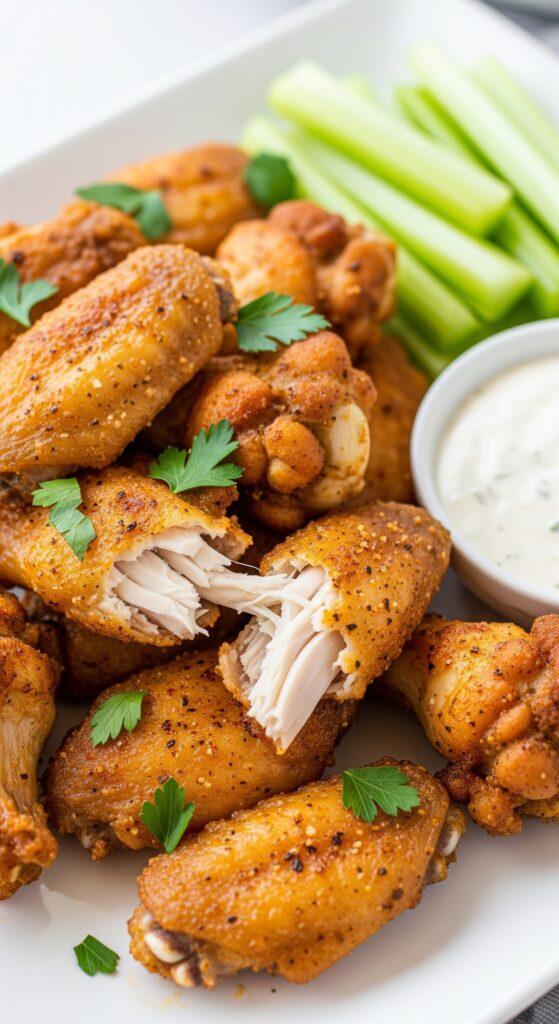
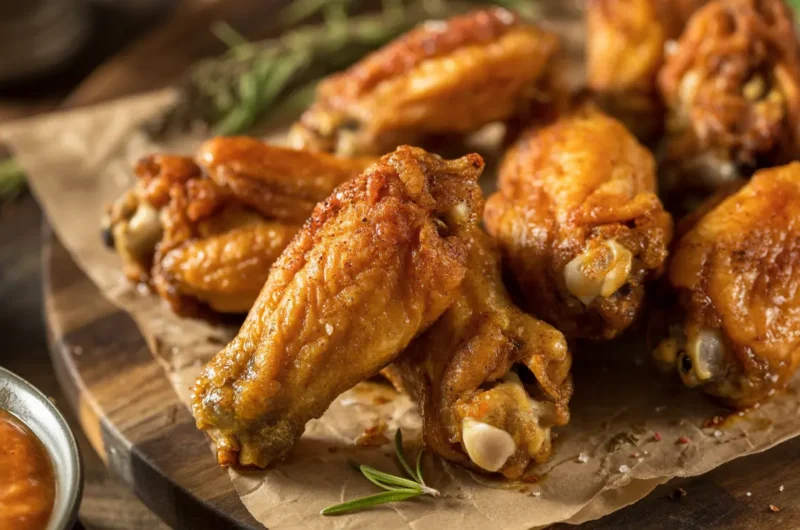
These air fryer chicken wings are legitimately crispy – the kind of crispy that makes that satisfying crunch when you bite into them. Golden brown skin, juicy meat inside, and absolutely zero oil splatter on my stove. My family now requests these wings weekly, and I’ve perfected the technique to get them crispy every single time.
Whether you’re making them for game day, a party, or just because you’re craving wings on a Tuesday night, this method works flawlessly. No deep frying, minimal cleanup, and wings that rival your favorite sports bar.
Recipe Card
Cuisine: AmericanDifficulty: Easy
4
servings10
minutes25
minutes282
kcal35
minutesIngredients
2 lbs chicken wings (about 16 wings, drummettes and flats separated)
1 tablespoon baking powder (NOT baking soda)
1 teaspoon salt
½ teaspoon black pepper
1 teaspoon garlic powder
1 teaspoon paprika
Cooking spray (optional)
- For Buffalo Sauce (optional):
½ cup hot sauce (Frank's RedHot recommended)
4 tablespoons unsalted butter, melted
1 tablespoon honey (optional, for sweetness)
Instructions:
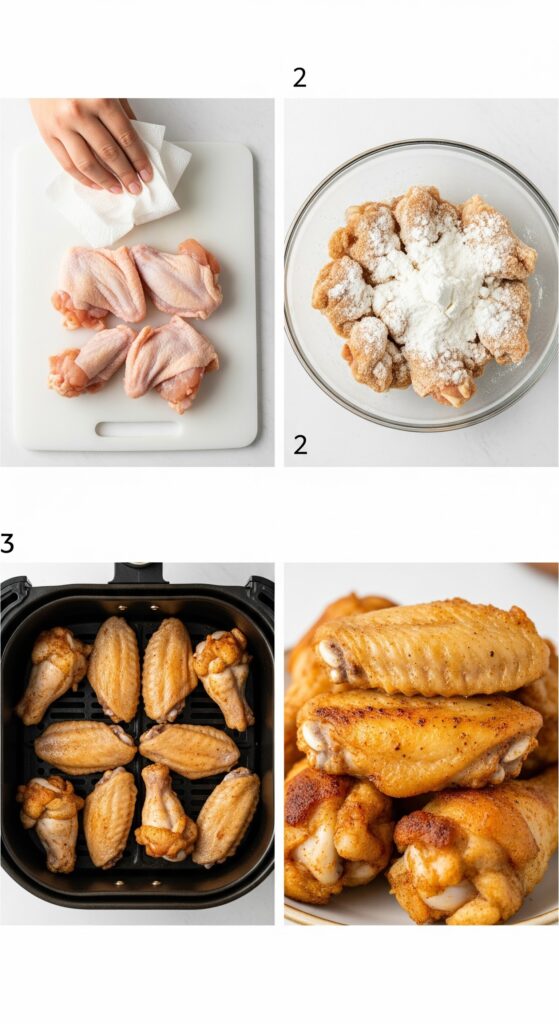
- Pat wings completely dry. This is the most important step! Use paper towels to thoroughly dry each wing. Any moisture will prevent crispiness. Let them air dry on a rack for 10 minutes if you have time
- Season the wings. In a large bowl, mix baking powder, salt, pepper, garlic powder, and paprika. Add wings and toss until every piece is evenly coated. The baking powder is the secret to extra crispy skin – don't skip it!
- Preheat air fryer to 380°F. Let it run empty for 3-4 minutes. Preheating ensures even cooking from the start.
- Arrange wings in a single layer. Place wings in the air fryer basket in a single layer with space between each piece. Don't overcrowd! Cook in batches if needed. Lightly spray with cooking spray for extra crispiness (optional).
- Cook for 12 minutes. Air fry at 380°F for 12 minutes without opening the basket.
- Flip and continue cooking. Open the basket, flip each wing over with tongs. Cook for another 10-12 minutes at 380°F until skin is golden brown and crispy.
- Increase temperature for final crisp. Turn heat up to 400°F and cook for 2-3 more minutes for extra crispy skin. Watch carefully to prevent burning.
- Rest and sauce. Let wings rest for 2 minutes. Toss with your favorite sauce or serve plain with dipping sauces on the side.
Recipe Notes
- Baking powder is essential – it raises the pH of the skin, allowing it to crisp better
Don't use baking soda – it tastes bitter and won't work the same way
Pat wings DRY – moisture is the enemy of crispy wings
Single layer only – overcrowding creates steam and soggy wings
No oil needed – chicken wings have enough natural fat
Sauce after cooking – tossing in sauce before cooking prevents crisping
The Secret to Crispy Air Fryer Wings
After making hundreds of batches of air fryer wings, I’ve learned that crispy wings come down to three critical factors:
1. Baking powder is non-negotiable. I know it sounds weird, but baking powder (NOT baking soda) is the secret weapon. It raises the pH of the chicken skin, which helps it brown faster and get crispier. This is the same technique used in Chinese restaurants for crispy Peking duck.
2. Dry wings are crispy wings. Moisture is your enemy. I spend a full minute patting each wing completely dry with paper towels. Some people even let their seasoned wings sit uncovered in the fridge for an hour to dry out the skin further. It makes a massive difference.
3. Don’t overcrowd the basket. I know it’s tempting to cram all the wings in at once to save time. Don’t do it. Wings piled on top of each other create steam, which makes them soggy. Cook in batches and keep the first batch warm in a low oven while the second batch cooks.
Follow these three rules, and I promise you’ll get restaurant-quality crispy wings every single time.
Step-by-Step to Perfect Wings
Let me walk you through exactly how I make these wings, with all the little details that make the difference.
Step 1: Prep Your Wings
If your wings aren’t already separated, use kitchen shears or a sharp knife to cut them into drummettes (the part that looks like a mini drumstick), flats (the two-bone middle section), and tips. I usually discard the tips or save them for making chicken stock.
The drying process: This is where most people go wrong. Grab a roll of paper towels and pat each wing individually. Get into the crevices. Flip them over and pat again. The wings should feel dry to the touch, not tacky or wet.
Pro tip: If you have time, place the dried wings on a wire rack set over a baking sheet and refrigerate uncovered for 30-60 minutes. This air-drying step removes even more surface moisture for maximum crispiness.
Step 2: The Magic Seasoning
In a large bowl, combine the baking powder with your seasonings. The baking powder should be aluminum-free if possible – it has a cleaner taste.
Why baking powder works: When heated, baking powder breaks down into carbon dioxide and sodium carbonate. The sodium carbonate raises the pH of the skin, which allows proteins and sugars to break down more easily, resulting in faster browning and crisping.
Toss the wings in the seasoning mixture until every surface is lightly coated. You don’t need a thick coating – just a dusting is perfect.
Step 3: Preheat Your Air Fryer
Set your air fryer to 380°F and let it preheat for 3-4 minutes. Some people skip this step, but I find preheating gives more consistent results, especially for the first batch.
Step 4: Arrange and Cook
Place wings in a single layer in your air fryer basket. They can be close together, but shouldn’t be touching or stacked. For a standard 5-6 quart air fryer, this usually means cooking about 8-10 wings per batch.
Optional spray: I sometimes give the wings a very light spray with cooking oil. The wings have plenty of natural fat, so this isn’t necessary, but it can help with browning if your air fryer tends to run a bit cooler.
Cook for 12 minutes without opening the basket. Resist the urge to check on them!
Step 5: Flip and Finish
After 12 minutes, open the basket and flip each wing over with tongs. They should be starting to brown and firm up. Cook for another 10-12 minutes.
The final crisp: In the last 2-3 minutes, I crank the temperature up to 400°F. This final blast of high heat really crisps up the skin. Watch them carefully during this time – the line between perfectly crispy and burnt is thin.
Step 6: Rest and Sauce
Pull the wings out and let them rest on a wire rack for 2 minutes. This brief rest allows the skin to crisp up even more and lets any excess moisture evaporate.
If you’re tossing them in sauce, do it now. If you want them extra crispy, serve the sauce on the side for dipping instead.
For more air fryer recipes, check out our complete collection!
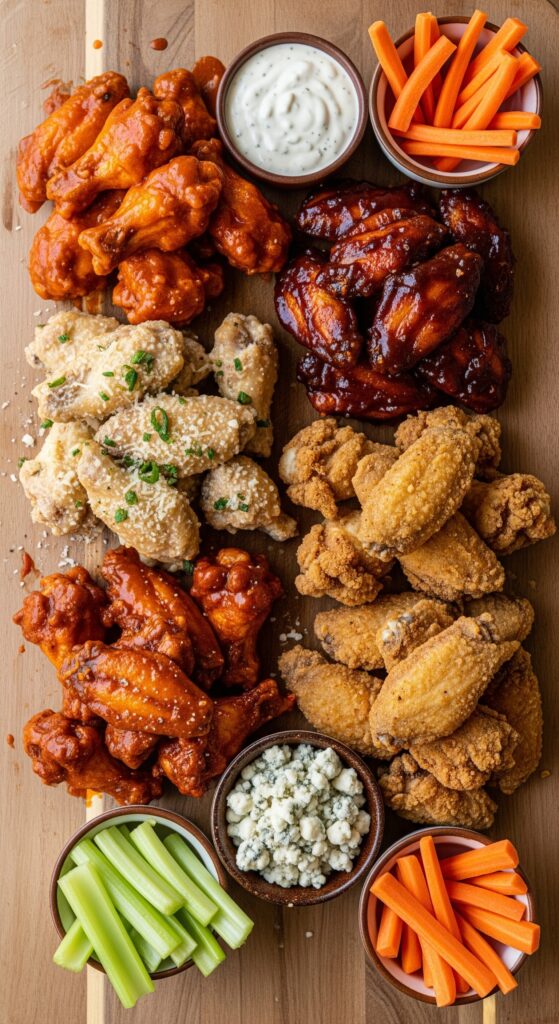
Flavor Variations
Once you nail the basic technique, these flavor variations will keep things interesting:
Classic Buffalo Wings
Toss cooked wings in a mixture of:
- ½ cup Frank’s RedHot sauce
- 4 tablespoons melted butter
- 1 tablespoon honey (cuts the heat slightly)
Serve with blue cheese dressing and celery sticks.
Dry Rub BBQ Wings
Before cooking, add to the seasoning mix:
- 2 tablespoons brown sugar
- 1 tablespoon smoked paprika
- 1 teaspoon chili powder
- ½ teaspoon cumin
Skip the sauce and serve these smoky wings dry.
Garlic Parmesan Wings
After cooking, toss wings with:
- 4 tablespoons melted butter
- 4 cloves minced garlic (sautéed until fragrant)
- ½ cup grated Parmesan cheese
- Fresh parsley
These are dangerously addictive.
Asian-Style Sticky Wings
After cooking, toss with:
- ¼ cup soy sauce
- 2 tablespoons honey
- 1 tablespoon rice vinegar
- 1 teaspoon sesame oil
- 1 teaspoon grated ginger
- Sesame seeds and green onions for garnish
Lemon Pepper Wings
Before cooking, use:
- Zest of 2 lemons
- 2 teaspoons coarsely ground black pepper
- 1 teaspoon garlic powder
- Salt to taste
Finish with a squeeze of fresh lemon juice.
Nashville Hot Wings
For the brave souls who love heat, after cooking, brush with:
- 4 tablespoons melted butter
- 2 tablespoons cayenne pepper
- 1 tablespoon brown sugar
- 1 teaspoon garlic powder
Serve on white bread with pickles like they do in Nashville.
More wing inspiration in our chicken recipe collection.
What to Serve with Air Fryer Wings
Wings are versatile and work for everything from casual weeknight dinners to party spreads.
Classic Wing Sides
- Ranch dressing or blue cheese for dipping
- Celery and carrot sticks
- Coleslaw
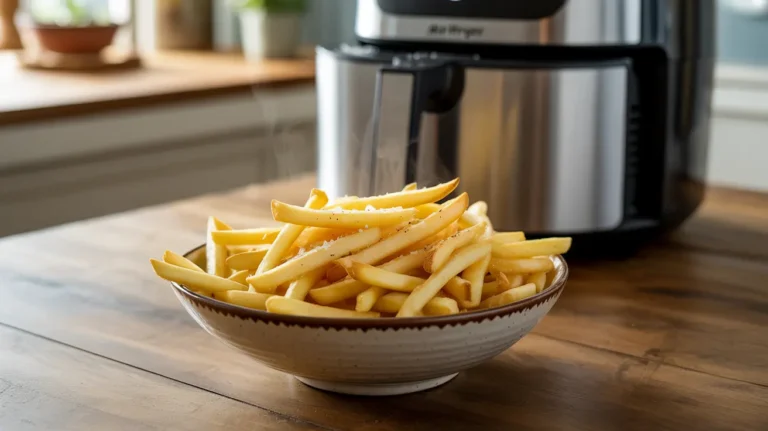
- French fries (also air fried!)
- Mac and cheese
Make It a Meal
Turn wings into a complete dinner:
- Serve over a Caesar salad for “wing salad”
- Pair with baked beans and cornbread
- Add potato salad and pickles for a BBQ vibe
- Make wing tacos with cabbage slaw and hot sauce
Game Day Spread
Planning a party? Wings are just the beginning:
- Buffalo chicken dip
- Loaded nachos
- Spinach artichoke dip
- Mozzarella sticks
Common Mistakes to Avoid
I’ve made every wing mistake possible so you don’t have to. Here’s what to avoid:
Mistake #1: Using Baking Soda Instead of Baking Powder
The problem: Baking soda tastes metallic and bitter. It will ruin your wings.
The fix: Always use baking powder. Double-check the label before adding it.
Mistake #2: Skipping the Drying Step
The problem: Wet wings = soggy wings. The moisture creates steam instead of allowing the skin to crisp.
The fix: Pat thoroughly dry. It takes an extra minute but makes all the difference.
Mistake #3: Overcrowding the Air Fryer
The problem: Stacked wings steam each other and won’t crisp properly.
The fix: Cook in batches. A single layer with space between each wing is essential. Keep the first batch warm in a 200°F oven while cooking the second batch.
Mistake #4: Not Flipping the Wings
The problem: The side touching the basket won’t get as crispy as the top.
The fix: Flip each wing halfway through cooking. Yes, it’s a bit tedious, but it ensures even crispiness on all sides.
Mistake #5: Saucing Before Cooking
The problem: Sauce creates a barrier that prevents the skin from crisping. Wet sauce also burns in the high heat.
The fix: Always cook wings naked (unsauced) first. Toss in sauce after they’re crispy, or serve sauce on the side.
Mistake #6: Not Preheating the Air Fryer
The problem: Starting with a cold air fryer means uneven cooking and less crispy skin.
The fix: Preheat for 3-4 minutes before adding wings.
Mistake #7: Using Frozen Wings Without Thawing
The problem: Frozen wings release tons of moisture as they cook, making them soggy.
The fix: Always thaw wings completely and pat dry before seasoning and cooking.
Mistake #8: Not Adjusting for Air Fryer Size
The problem: Different air fryer models have different strengths and sizes.
The fix: Check wings at the minimum time and adjust as needed. Smaller air fryers may cook faster; larger ones may need a minute or two more.
Storing and Reheating
Storing:
- Let wings cool completely
- Store in an airtight container in the refrigerator
- Keep for 3-4 days
- Store sauced and unsauced wings separately if possible
Freezing:
- Freeze cooked wings in a freezer bag for up to 3 months
- Flash freeze on a baking sheet first, then transfer to a bag to prevent sticking
- Thaw in refrigerator overnight before reheating
Reheating: The best way to reheat wings and maintain crispiness is back in the air fryer:
- Preheat air fryer to 350°F
- Arrange wings in a single layer
- Heat for 5-7 minutes until warmed through and crispy again
- No need to flip
Avoid: Microwaving will make them soggy. If you must microwave, reheat briefly, then crisp under the broiler for 2-3 minutes.
Frequently Asked Questions
Do I need to use oil on air fryer chicken wings?
No! Chicken wings have plenty of natural fat. The skin will crisp up beautifully without any added oil. A light spray of cooking oil is optional and can help with browning, but it’s not necessary.
Can I cook frozen wings in the air fryer?
You can, but I don’t recommend it. Frozen wings release a lot of moisture as they cook, which prevents the skin from getting crispy. For best results, thaw completely, pat dry, and then cook.
Why do my wings stick to the air fryer basket?
This happens when the skin isn’t fully crisped before you try to flip them. Let them cook the full 12 minutes before flipping – they’ll release easily once the skin is set. A light spray of cooking oil on the basket before cooking can also help.
How do I know when the wings are done?
Wings are done when the internal temperature reaches 165°F in the thickest part. Visually, they should be golden brown with crispy skin. If you’re unsure, use an instant-read thermometer.
Can I make these ahead for a party?
Absolutely! Cook the wings up to 2 hours before serving. Keep them warm in a 200°F oven on a wire rack. They’ll stay relatively crispy. Sauce them just before serving. For maximum crispiness, reheat in the air fryer at 400°F for 2-3 minutes right before serving.
My air fryer is smaller/larger – how do I adjust?
Cook times are for a standard 5-6 quart air fryer. For smaller air fryers (3-4 quart), check wings at 20 minutes total. For larger air fryers (7+ quart), you may need an extra 2-3 minutes. Always check for doneness with a thermometer.
Can I use chicken drumsticks instead of wings?
Yes! Use the same method but increase cooking time to 25-30 minutes, flipping halfway through. Drumsticks are meatier and take longer to cook through.
Should I remove the wing tips?
I usually do. Wing tips don’t have much meat and tend to burn. Save them for making stock instead. Most stores sell wings already separated into drummettes and flats, which is convenient.
Final Thoughts
These air fryer chicken wings have become my go-to recipe for everything from busy weeknights to hosting friends for game day. Once you nail the basic technique – dry wings, baking powder, single layer, proper temperature – you’ll never want wings any other way.
The beauty of this recipe is its versatility. Keep them simple with just salt and pepper, go classic buffalo, experiment with dry rubs, or toss them in your favorite sauce. They’re crispy, flavorful, and so much easier than deep frying.
Remember the three golden rules:
- Pat the wings completely dry – moisture prevents crisping
- Use baking powder – it’s the secret to restaurant-quality crispy skin
- Don’t overcrowd the basket – cook in batches for maximum crispiness
Make these once, and I guarantee you’ll be adding them to your regular rotation. They’re that good.
Happy cooking!